Children’s artwork is a wonderful expression of creativity and imagination. As parents and caregivers, it’s natural to want to cherish these masterpieces. However, the constant flow of drawings, paintings, and craft projects can quickly lead to piles of paper and cluttered spaces. Keeping kids’ art organized not only helps maintain a tidy home but also allows you to enjoy and celebrate their creativity over time.
In this post, we’ll explore effective strategies to organize, store, and display your child’s art in ways that are both practical and visually pleasing.
Why Organize Kids' Artwork?
Before diving into tips, it’s helpful to understand why organizing kids’ art is beneficial:
– Memory preservation: Artworks capture moments in your child’s development.
– Clutter reduction: Avoid overwhelming piles that take up space.
– Encouragement: Displaying art motivates kids to keep creating.
– Easy access: Organized art is easier to revisit and cherish.
Now, let’s explore some tips for keeping kids’ art organized.
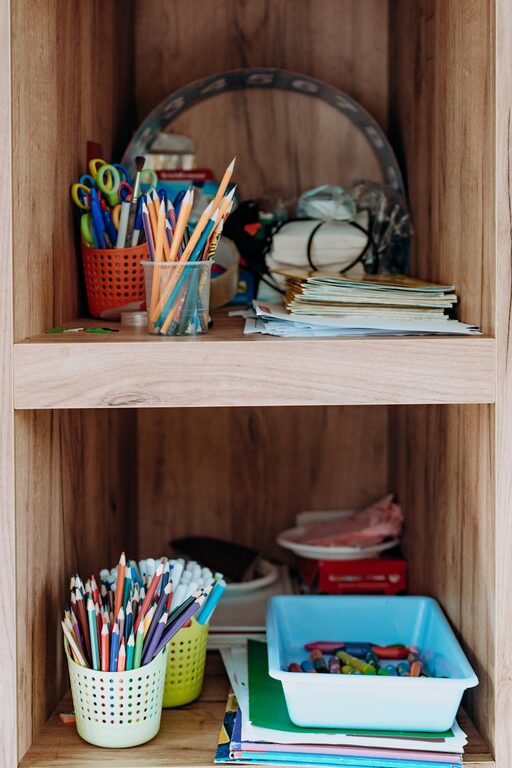
1. Create a Dedicated Art Space
One of the best ways to keep art organized is to start with a designated space for creating and storing.
– Art station: Set up a table or corner stocked with supplies and storage bins.
– Shelves or cubbies: Use shelves or open cubbies nearby to hold current projects.
– Clear containers: Use transparent boxes to store supplies and finished pieces separately.
Having a clear, consistent location helps contain art materials and completed works, making tidying more manageable.
2. Use Display Areas to Showcase Creations
Displaying your child’s artwork not only honors their effort but also controls clutter by giving pieces a temporary home.
– Bulletin boards or corkboards: Pin recent pieces for easy rotation.
– String and clips: Stretch a string across a wall or window frame to hang art with clothespins.
– Frames with changing inserts: Use frames designed to swap art regularly; this creates a gallery feel.
– Magnetic boards: Attach magnets to back of pieces for display on refrigerators or metal boards.
Rotate the display regularly, and consider taking photographs of art before replacing older pieces.
3. Implement a Filing System
Organizing artwork in folders or files helps keep a long-term record without overwhelming your space.
– Portfolios: Purchase art portfolios with plastic sleeves to store multiple pieces flat.
– Binders and sheet protectors: Sort artwork by date or theme in binders with clear sleeves.
– Accordion folders: Label sections by year, school grade, or style.
– Flat storage boxes: Use shallow boxes to store larger pieces or 3D artwork.
Label each file or portfolio clearly to make retrieval simple.
4. Digitize Artwork for Preservation
Scanning or photographing art provides a lasting record and frees up physical space.
– Scan flat pieces: Use a scanner for best resolution.
– Photograph 3D projects: Take clear photos against a clean background.
– Create digital albums: Organize images by date, event, or project.
– Use apps: Several apps are designed to help capture and organize kids’ artwork digitally.
Digitizing artwork allows you to create photo books or slideshows, making sharing with family easy and reducing physical storage needs.
5. Establish Art Rotation and Keep Only Favorites
To avoid overwhelming amounts of artwork, create habits around managing new creations.
– Display with rotation: Keep only a few pieces on display at a time.
– Set limits: Decide on a fixed number of artworks to keep each month or year.
– Involve your child: Let kids choose their favorites to keep.
– Recycle responsibly: Reuse or recycle less sentimental works.
This encourages thoughtful selection and keeps your collection meaningful.
6. Use Creative Storage Solutions for 3D Art
Three-dimensional art, like sculptures and crafts, often require special storage.
– Shadow boxes: Use these to showcase and protect delicate pieces.
– Clear plastic bins: Store grouped projects and label them by date or event.
– Display shelves: Dedicate shelves specially for 3D art to keep them from cluttering other areas.
– Photo documentation: For bulky items, photograph creations before deciding to keep or let go.
Consider how much space is available and adjust storage solutions accordingly.
7. Repurpose Artwork into Gifts and Keepsakes
Transforming kids’ art into gifts or household items can give pieces new life and purpose.
– Greeting cards: Fold artworks into personalized cards for friends and family.
– Calendars: Scan and print a calendar featuring different pieces each month.
– Custom items: Use online services to print art on mugs, t-shirts, or pillows.
– Collages: Combine smaller pieces into one larger framed work.
This approach celebrates creativity and reduces accumulation.
8. Schedule Regular Art Organization Sessions
Make organizing artwork part of a routine rather than a stressful event.
– Monthly review: Dedicate a time each month to sort and file artwork.
– Involve your child: Use it as a bonding activity while teaching organizational skills.
– Celebrate progress: Highlight new favorites and talk about the creations.
Regular sessions keep the process manageable and fun.
—
Final Thoughts
Keeping kids’ artwork organized doesn’t have to be daunting. With a few simple strategies—creating dedicated spaces, using displays, filing systems, digitizing artwork, and involving your child—you can maintain a clutter-free home while preserving those precious creative moments. Remember, the goal is to celebrate your child’s artistic journey in a way that fits your family’s lifestyle.
Try out these tips and discover what works best for you and your family. Happy organizing!